Hosting a Hugo site on Bunny.net

Hosting the site
Hosting a static website needs a different approach than that required for a more traditional database/php application.
Things are (in theory) much more simple.
There are a lot of guides out there for how to deploy a Hugo site via GitHub for live updating… but my eyes gloss over when I start to read some of them.
To start with, let’s just go with something very simple.
In essence, we need:
- An online place to store the html files and assets that Hugo generates
- A way to expose them to the public via a domain name
Bunny.net
I have used Bunny.net on various occasions as a high-performing, low-cost CDN for my Wordpress sites in the past, so it was a no-brainer for me to look there first.
I know there are free options to host static sites, but this is close enough for me. I’ll explore other options later.
Bunny.net allows me to:
-
Create a ’storage zone’ to upload my files. This storage zone can also be replication on servers all around the world to keep my files as close to a global audience as possible.
-
Create a ‘pull zone’ that will connect my domain name to my storage zone and allow people to view my website at hugolab.dev.
For a small, low traffic site this will cost cents per month.
Creating A Storage Zone
First you need to sign up for a Bunny.net account. I won’t bore you with the details as it’s the same as signing up for any service.
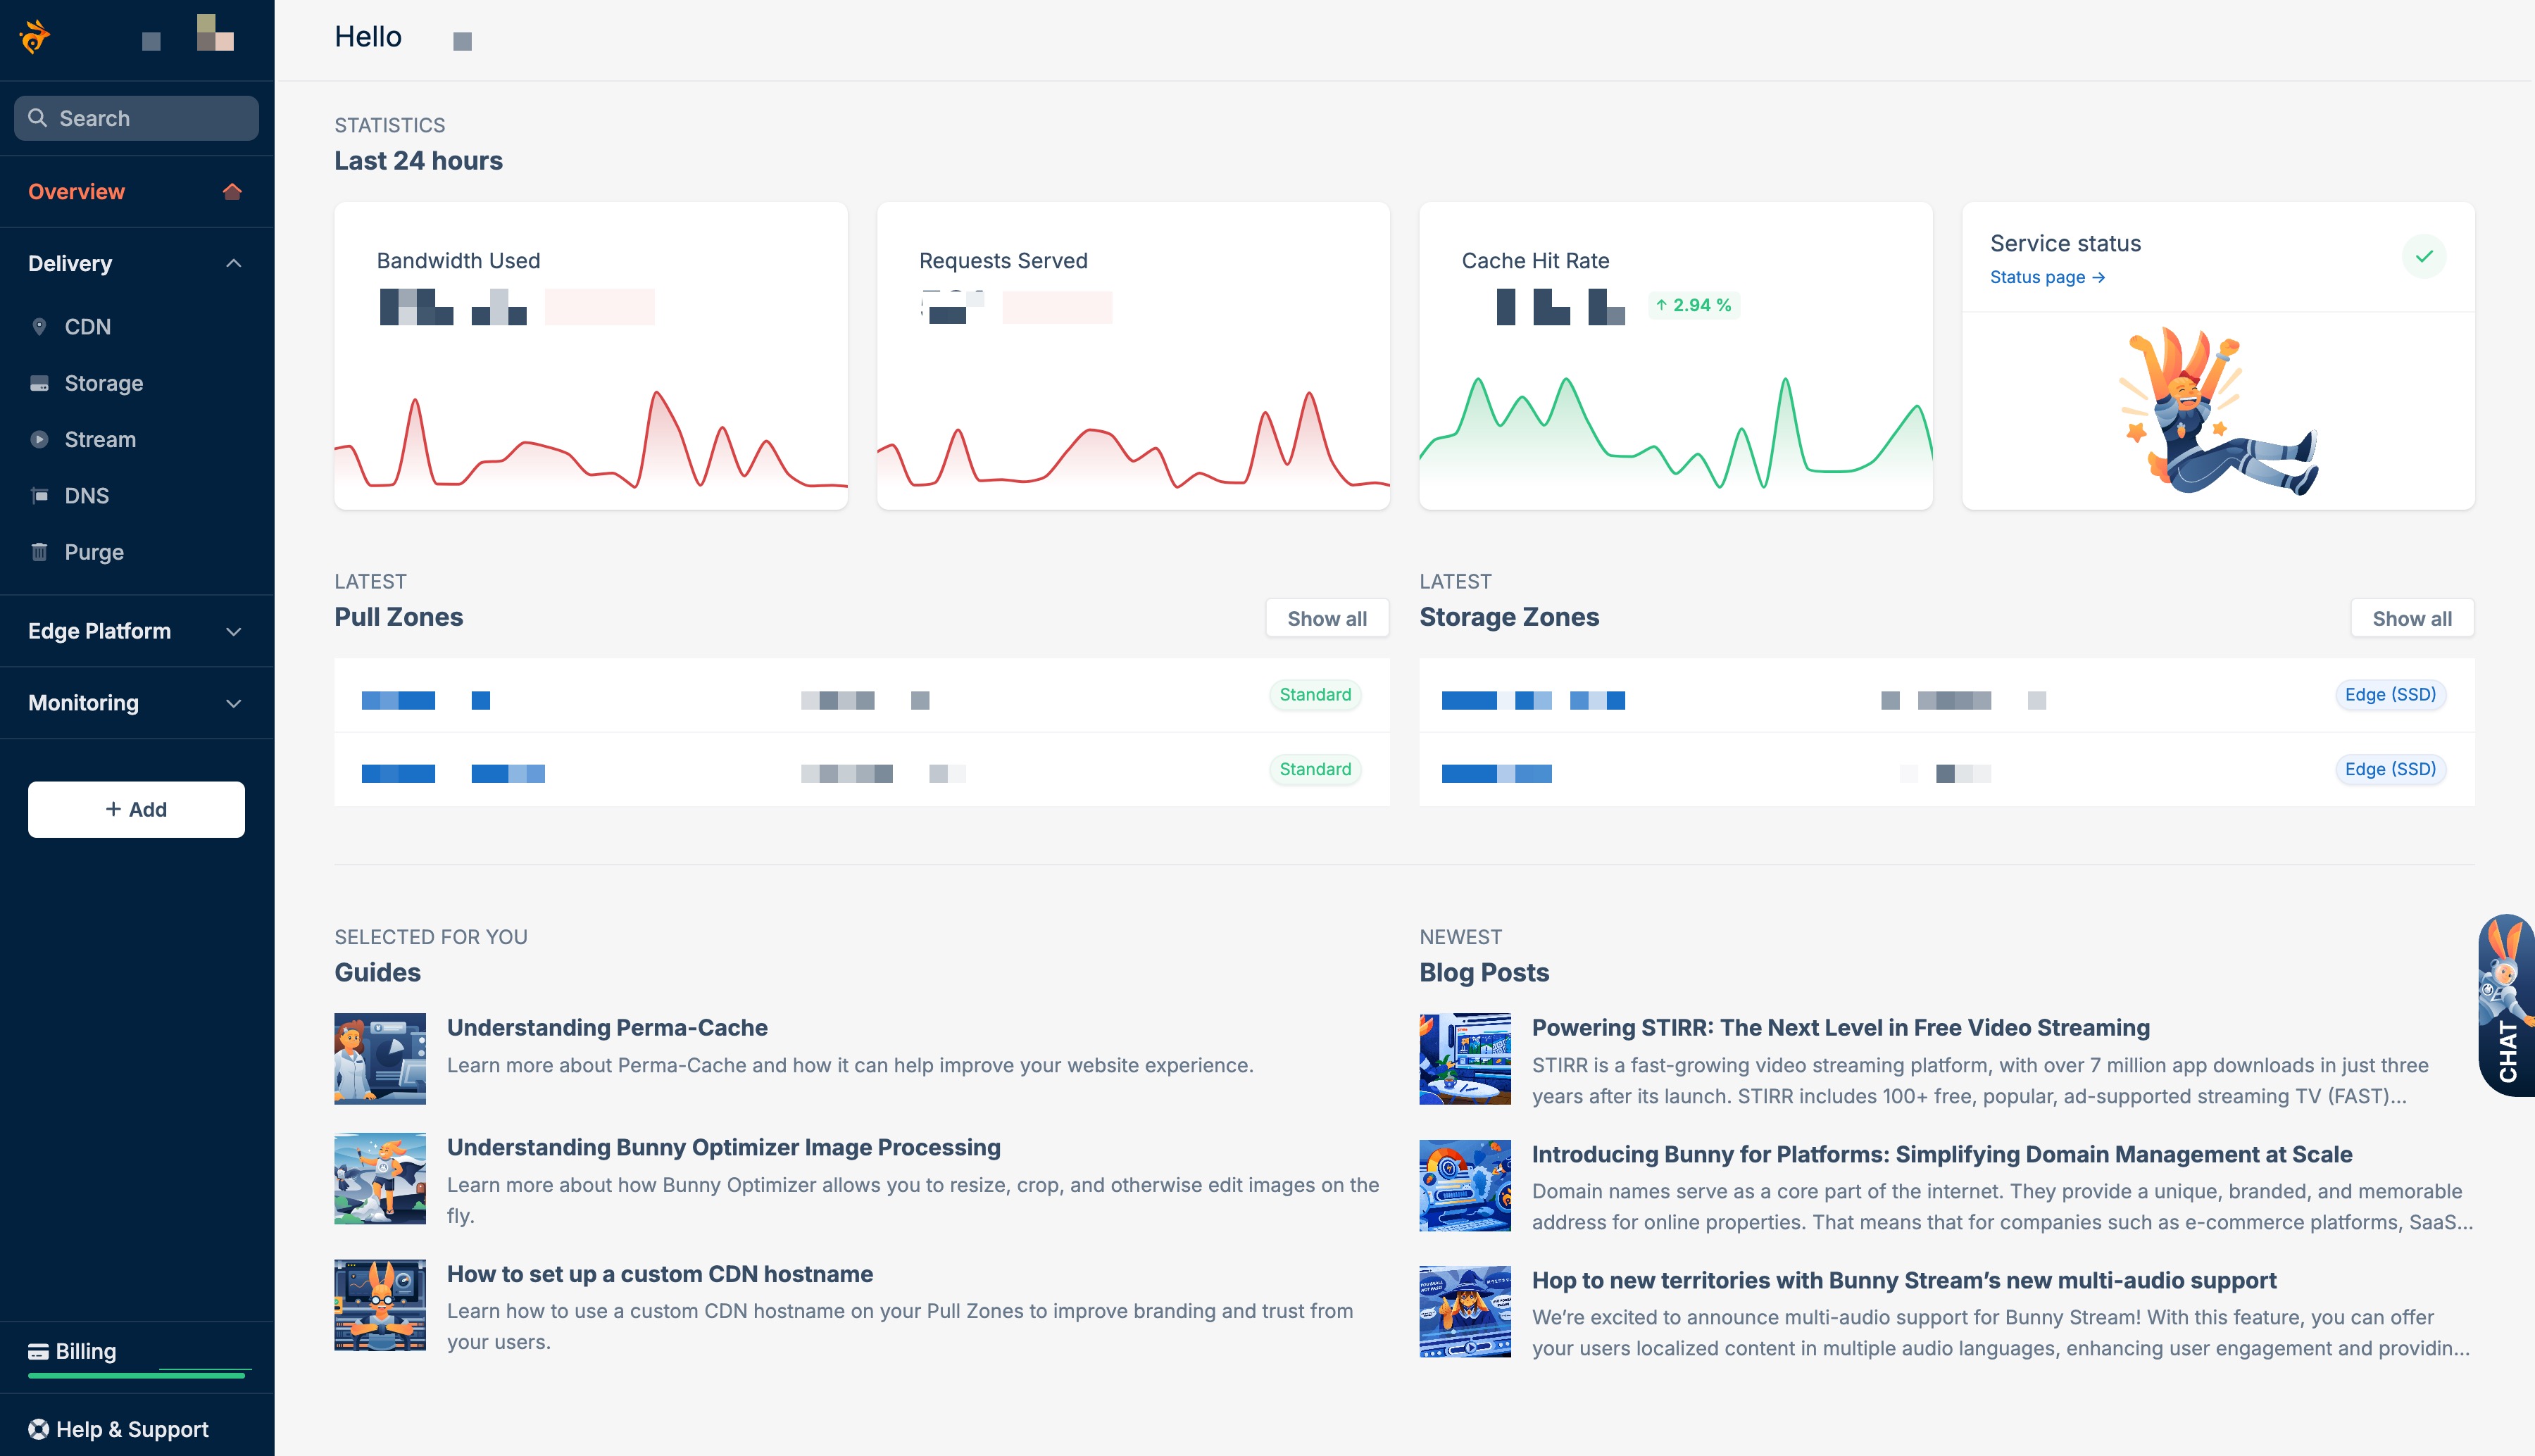
Once you’re logged in you will see something like this:

We will need a new storage zone for each of our sites to keep the files separated. Go to the storage zone section of the dashboard and click on ‘Add Storage Zone’

Next, we’ll fill in the options for our storage zone.
Storage Zone Name and Tier
Call it what you want. Something related to your site is probably best.

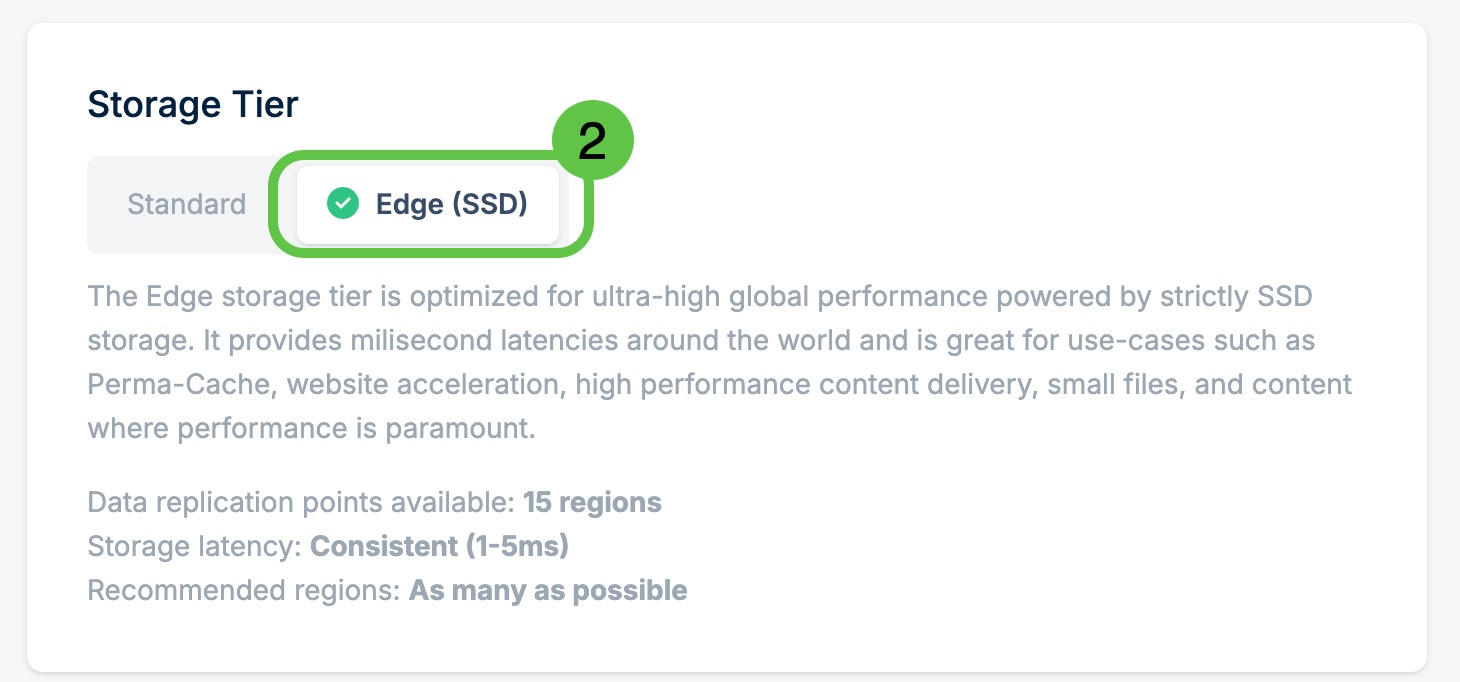
I strongly suggest selecting the ‘Edge (SSD)’ option for the tier as it will greatly speed up the delivery of your files when the CDN hasn’t cached them. This option is more expensive than the ‘Standard’ tier - but still very cheap for most web storage needs at US 2 cents per gigabyte per month.

Storage Zone Location and Replication
If you chose the Edge Storage option you may not get a choice of where you will upload your files. If you do get a choice, choose the closest location to you.

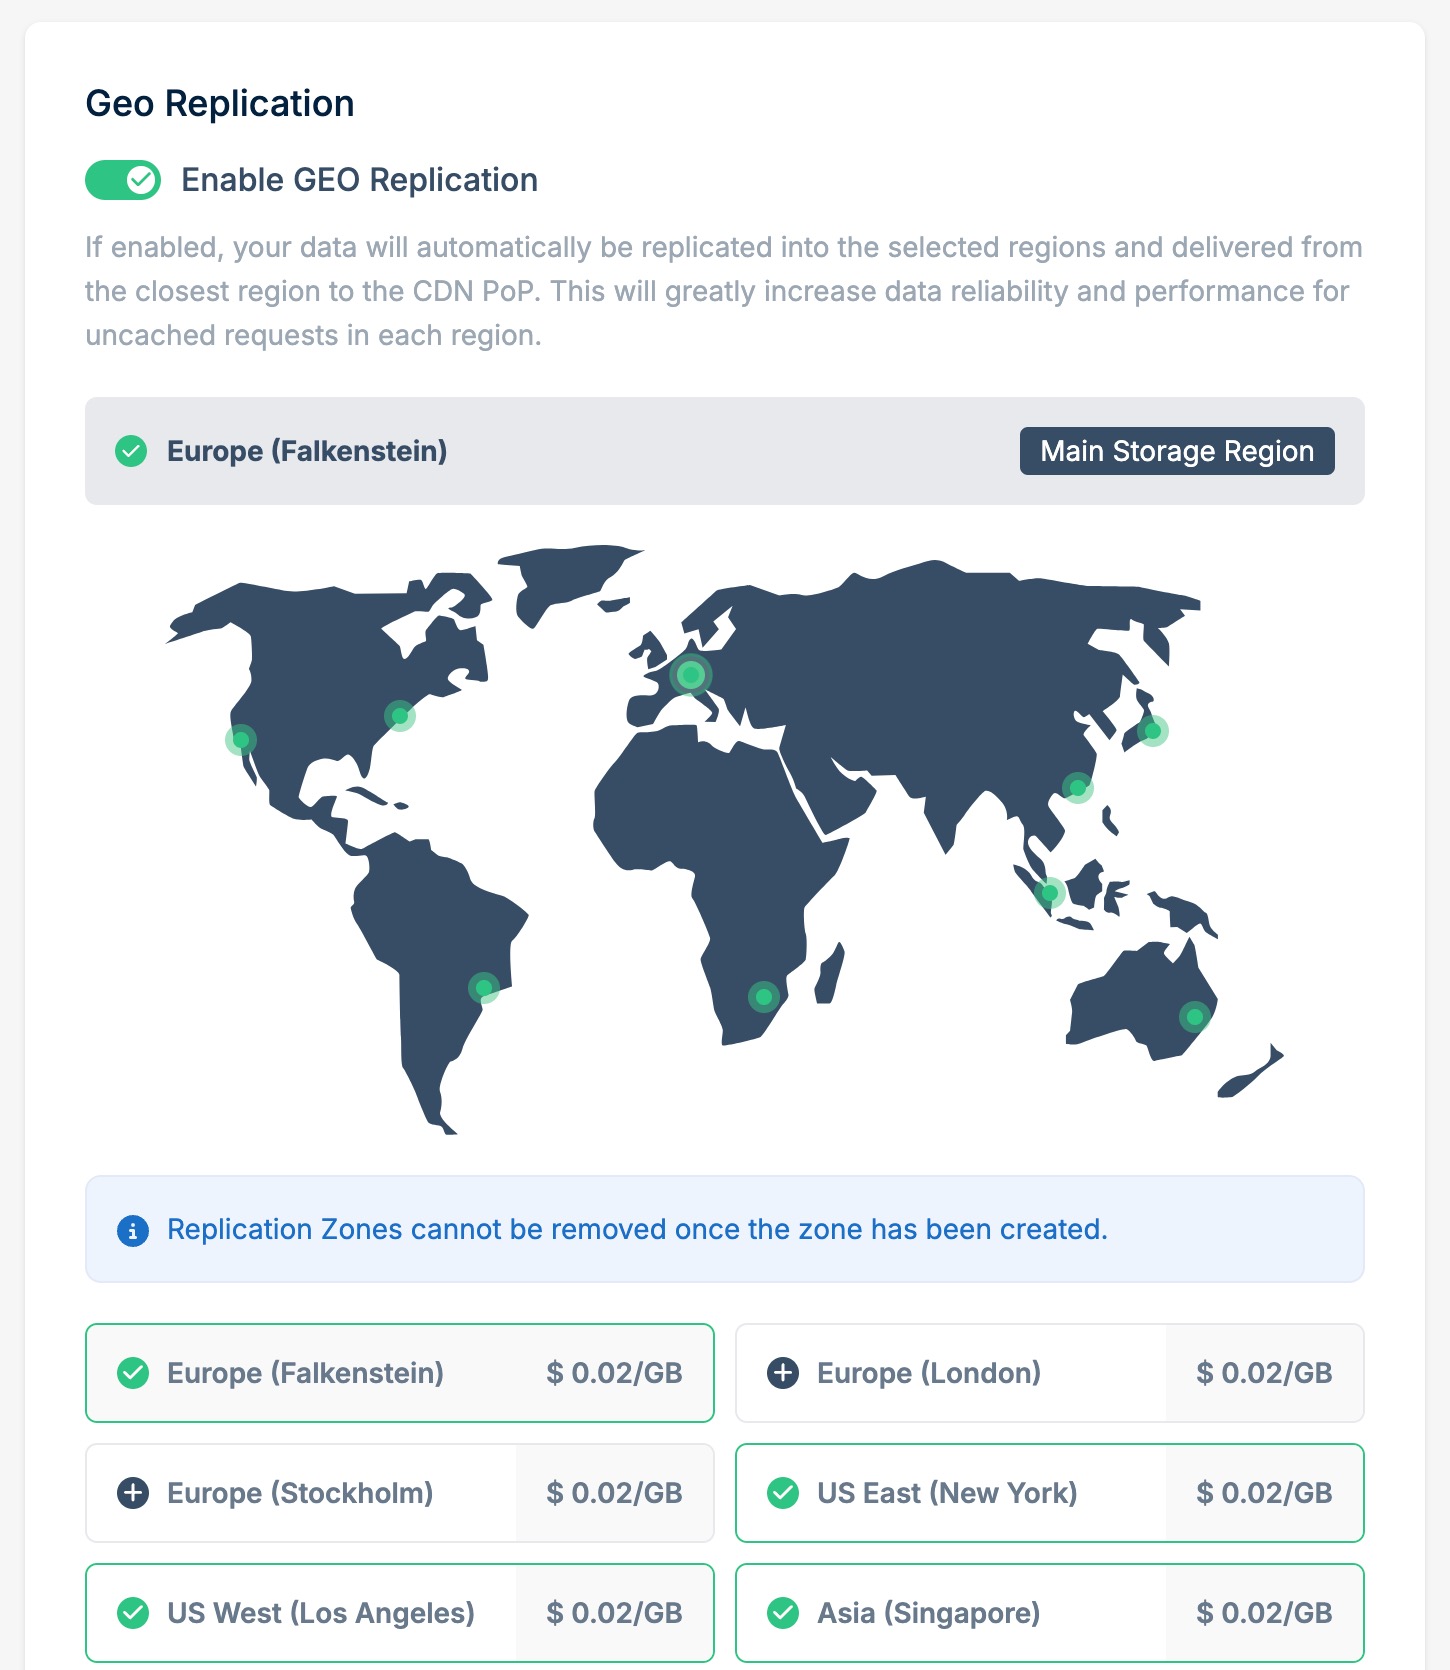
Replication options will need a bit of thought (not too much).
The files you upload can be replicated to data centres around the world. This will bring the files closer to the CDN locations that will serve the files to your site visitors. The smaller the distance that your files have to travel between their storage and your visitors, the faster the site will be.
Your files won’t be directly served from their storage location - the CDN we will set up later will request the files and will cache them on the CDN servers. For maximum site performance you will want your files stored as close to your CDN server locations as possible so that when the CDN has to request the file from the file location, it happens as quickly as possible.
The more locations you choose, the more expensive your storage costs will be. For sites with low storage requirements, even choosing all locations will still be quite cheap. At the time of writing it would cost 30 US cents per month for every gigabyte of storage.
I recommend you choose a nice spread of locations around the world if your website is for a global audience as you will do the same when you set up your CDN locations. If not, just choose locations close to where your visitors will be from.

The only kicker to this is that once you’ve selected a replication location, you can’t remove that option at a later date (you can add new locations later though). Hopefully that will change in future.
Creating A Pull Zone
Now we have a place to store our files, but you can’t actually serve the files from their storage location.
For that you need a ‘Pull Zone’.
A Pull Zone will expose your files to your website visitors via your domain name. It is also a CDN that will cache your files in various locations around the world to ensure fast delivery to your site visitors. The process looks something like:
- Visitor visits your site
- A DNS server will point the visitor to the closest Bunny.net CDN location
- If the page that the visitor has requested is cached at the CDN location it will deliver that file to the visitor
- If the page hasn’t been cached, the CDN will request the file from the closest storage location. The file will be delivered to the visitor and cached on the CDN for the next visitor.
- Steps 2-4 are repeated for any other files on that page (images, css, javascript, etc)
Uploading The Website
Now all that’s left is to upload your website.
Basically you need to get all of the files in the /public folder from your PC to your Bunny.net storage location. There are quite a few ways to do this:
Via SFTP
You can connect your favourite SFTP application with your Bunny.net storage and upload the files that way.
I use an application called GoodSync to do this. It’s probably not the most efficient way to do things, but it will only upload files that have changed since your last upload.